

I really L.O.V.E. how they turned out! Jay and I had a blast making them too, which makes them all around winners in my book!!
Here is a list of the supplies I used:
Three different sized Terra Cota pots, one small, one medium, and one large
White Spray paint
Clear Gloss Spray paint
Pink Acrylic Paint
Turquoise Acrylic Paint
Purple Acrylic Paint
1/2 inch PVC pipes--left over from the chicken run we built
Wooden Skewers
A black Sharpie
3 different sized circular objects to use at stamps, I used marsh mellows, mini Reese's Peanut Butter cups (the ones in the foil wrappers), and Hershey's kisses
Potting Soil
10 Plants
Rocks
Hot Glue
Floral Foam (you can find this at the dollar store, or any craft store, it's green)
Here's What I Did:
1. Spray paint all three pots, inside and out, with white spray paint, and allow them to completely dry
2. Make sure that your PVC pipe will pit through the hole in the bottom of each pot. It wouldn't fit through the hole in the bottom of my small pot, so I had The Hubbs use a screwdriver and hammer to chisel out the edges of the hole and make it bigger. We broke one pot in the process, so be very careful!!
3. Decorate your pots:
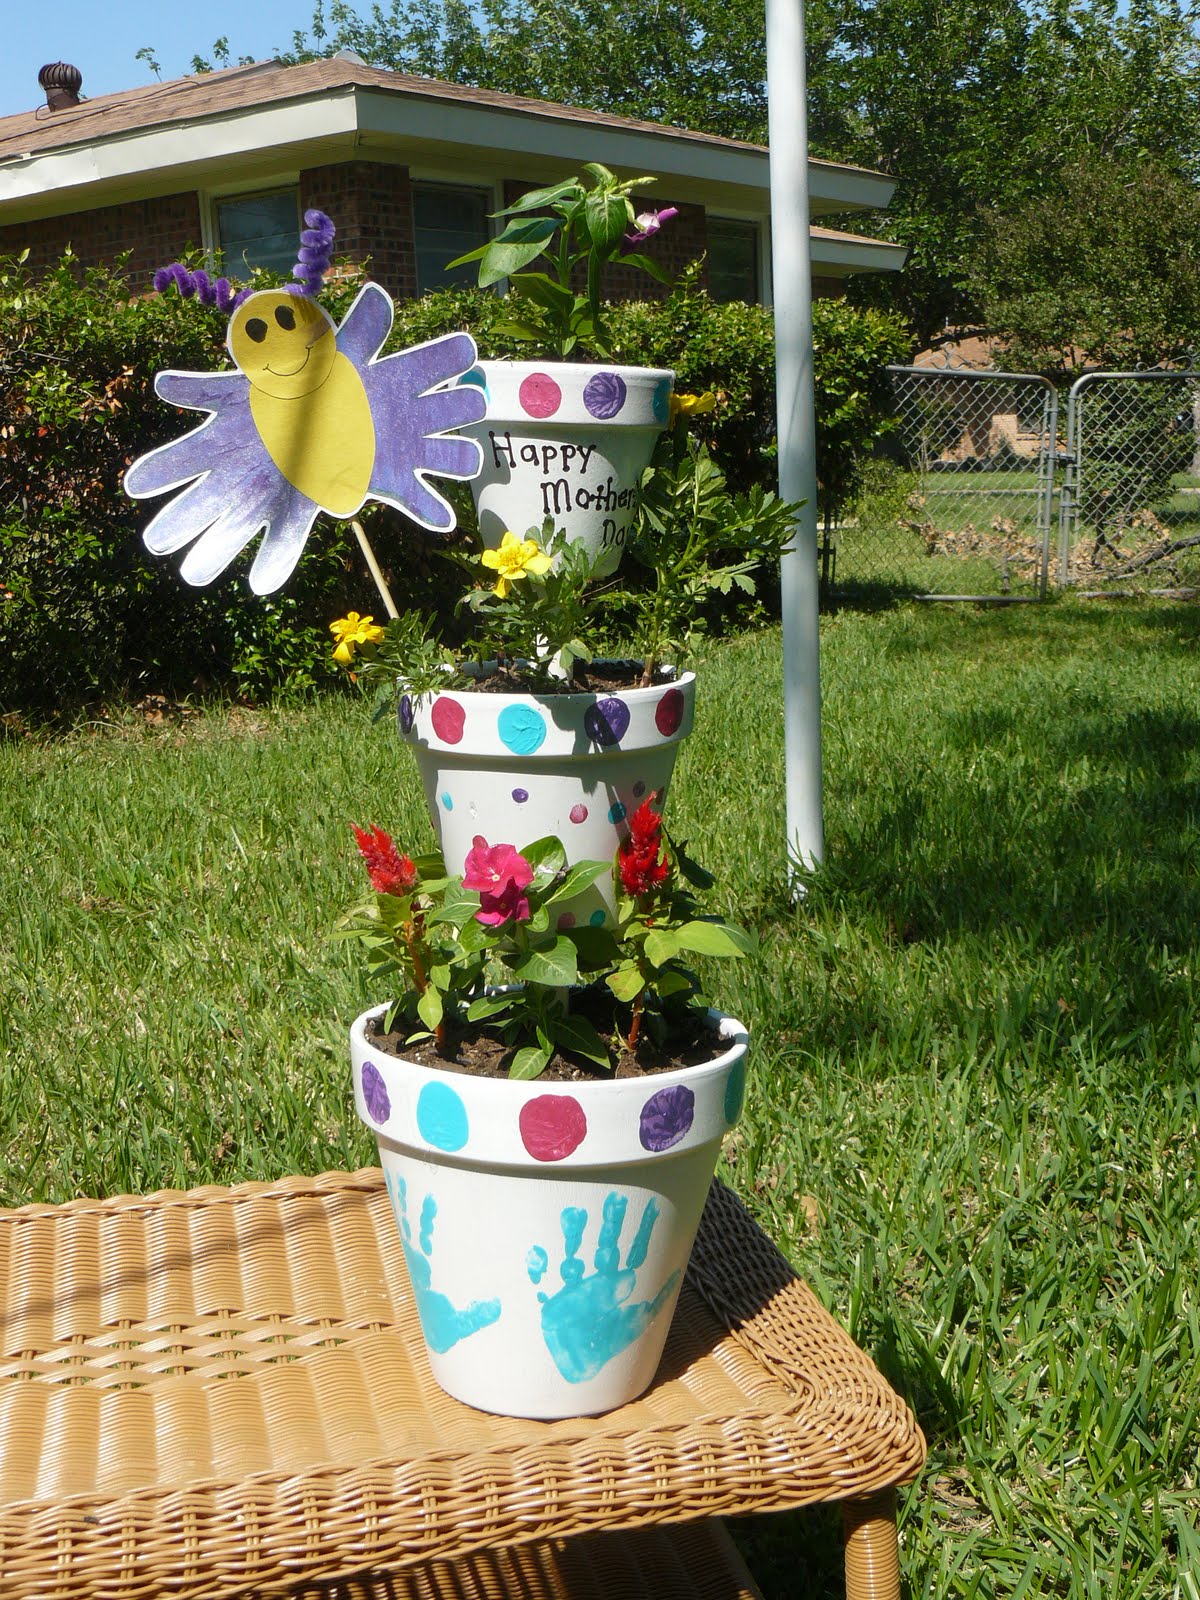
For our big pot, I had Jay put his hand prints all the way around the bottom of the pot, then He used marsh mellows to stamp the circles around the top of the pot:

For the medium pot, Jay dotted his fingerprints all around the bottom of the pot, and he used the mini Reese's Peanut Butter cup candies to stamp the circles around the top of the pot:

For the small pot, Jay used Hershey's kisses to stamp the circles around the top of the pot, and I wrote Happy Mother's Day on the bottom of the pot:

4. After the acrylic paint has completely dried, spray the pots with two coats of the clear gloss spray paint.
5. Figure out how long your piece of PVC pipe needs to be , I didn't really measure, I just eye balled it. I think mine ended up being between 18 and 24 inches tall. A good pair of garden sheers works great to cut the PVC, but I had The Hubbs use his saw.
6. Figure out where you want the medium and small pots to sit on the PVC pole, and mark it with a pencil. You need some of the pole to stick up into the small pot, mine had about 2 or 3 inches if pole sticking up into it.
7. Use a drill bit that is about the size of your wooden skewers to drill a hole through your PVC pole in the places you marked with your pencil.
8. Make sure that your PVC pole doesn't fit through to hole in the bottom of your large pot. Mine did, so I just hot glued a few pieces of a wooden skewer over the hole to keep the PVC pole from slipping through it when you pick the pot up.
9. Trim your piece of floral foam and wedge it down into your large pot.
10. Stick your PVC pole down into the floral foam so that it is centered in the large pot.
11. Cut your wooden skewers so that you have a piece of skewer the size of the bottom of the medium pot, and one the size of the bottom of the small pot.
12. Stick the skewer piece for the medium pot through the hole in your PVC pole and hot glue your medium pot to the skewer. (I added some hot glue on the inside of the pot next to the PVC pole to stabilize the pot a little more too.)
13. Follow the same process as in step 11 to attach the small pot
14. Put some rocks (I had Jay collect some from our yard) around the floral foam in the large pot, just to give it a little more weight. Be sure to leave room to plant your plants on top of the rocks and foam.
15. Plant your plants, and you are ready to go! :0)
These were fairly easy to make, and we had a lot of fun with them! Jay and I made these over the coarse of about a week. We would do a little each day, so that it stayed fun for Jay, and he didn't get tired of working on them!
You may have also noticed Jay's hand print butterflies stuck into the pots:
They were fun ans easy to make too!
Here's what I did:1. I traced Jay's hands onto a piece of construction paper
2. I let Jay use some of the same paint we used on the flower topiary to singer paint the hand prints
3. I cut out the hand prints
4. I cut out an oval shape, and a circle shape out of a different colored piece of construction paper
5. I glued the pieces together in the shape of a butterfly and glued it all to a piece of white card stock, but another piece of construction paper would work just fine too.
6. I had Jay use some black acrylic paint to make eyes for the butterfly, and I used a sharpie to make the mouth.
7. I took a pipe cleaner, cut it in half, wound each half around a pencil to make the spiral, and hot glued it to the back of the butterfly's head
8. Then I hot glued the butterflies to a wooden skewer so I could stick them into the plants. :0)
There yo have it! Easy Peasy! These really turned out great! Ha ha I think I am going to make another one, for myself sometime soon! :0)


No comments:
Post a Comment