Thursday, December 30, 2010

Meet Fancy Bunny

Jay decided that this year for Christmas, he wanted a pet bunny rabbit.  He has been VERY consistent with this idea for months.  He never once faltered and said he wanted anything else for Christmas.  I was all for him getting a nice stuffed "pet" bunny...but Santa had much bigger ideas!  

Santa found a local 4H breeder that was selling baby Mini Rex bunnies.  And y'all...they were SO cute!  They were born October the 14th, which meant they would be ready just a few weeks before Christmas.  Luckily, Grandma helped Santa out and kept the baby bunny at her house until Christmas Eve.  (Santa had waayyy too much going on at the North Pole to properly socialize a baby bunny!!)

So Christmas Eve, this showed up at our house:


Santa even left a trail of carrots from Jay's bedroom door to the bunny cage in the living room:


Christmas morning dawned and Jay was one happy little man!!  Ha ha I don't think he even cared about his other presents.  (Until he got to the swing set from Nana and Papa, but that is a whole different story!)  Grandma asked Jay what he was going to name his bunny.  Jay thought about it for a few seconds and said Fancy!  Ha ha and Lord only knows where he came up with that, but it certainly fits! 


 So without further adieu, I would like to introduce you to the newest member of our family:

Fancy Bunny


She really is a cutie!  She loves to frolic and hop around our house, and she even tries to play with Dutchess!  She is a bit of a priss, and definitely has a little bit of an attitude.  Her favorite spot is under the Christmas tree, so she will probably not be too happy when we take it down.  And, most importantly, Jay absolutely LOVES her!!   

Tuesday, December 28, 2010

Oh Christmas Tree

Much to the Hubbs' dismay, I LOVE real Christmas trees!  And the bigger they are...the better. 

This year, our ceilings are two feet shorter than they were in our last house, so it was difficult for me to pick out a tree, but we managed to find a really great one!  We usually buy a Douglas Fir, but this year they all looked awful, so we ended up with a Noble Fir.  I liked it so much, that we might get the same kind again next year!!

Jay had a blast running around through the trees, and using stray branches to "sweep" up pine needles. 

Here is our tree tied to the top of our car:

We got the tree inside, but once we got it into the tree stand...it was too tall.  So we had to cut off a few inches from the top.  Oops! 

Jay was very excited to decorate the tree!  With the exception of the lights and bows, he decorated the entire bottom portion of the tree by himself. 


I made all of the stuffed ornaments for Jay's first Christmas.  I wanted our tree to be safe for him to play with!


This is the tree on Christmas morning:

I know some people are big into themes and their trees have to be *just* so, and that is all well and good...but I am not that kind of person!  :0)  Every ornament on our tree means something to our family.  They have been made by a loved one, or were gifts from people that mean a lot to us.  Jason's aunt showed me how to make the bows. And the star on top of our tree used to sit on top of my Grandma's tree.  To me, our trees will always be perfect! 
I am proud (or should I be embarrassed?) to say that this is the first tree that we have ever had that was not a dried up mess by Christmas day!  Hooray!! 

Blueberry Syrup

Are you looking for a yummy breakfast idea for New Years Day?  Make some buttermilk pancakes, and give this blueberry syrup a try, you won't regret it!  Ha ha of course, I will even eat this on toast...so if you're too tired for pancakes, you can still enjoy this recipe.  I like to make it ahead of time and then just reheat it when we go to eat our pancakes.  It stores great in a mason jar for up to a month!

Ingredients:
1 pint of blueberries
1 cup sugar (or try 1/2 cup sugar and 1/2 cup honey for a yummy variation)
1/4 cup water
a dash of nutmeg--just a little bitty pinch to enhance the flavor
a dash of salt--again, just a tiny pinch of it
**you can also add in about 1/4 teaspoon of vanilla, but if you do, use all sugar.  For some reason the vanilla and the honey just don't do well together.**

Directions:
Place ingredients in a saucepan
Cook over low to medium heat
Crush berries against the side of the pan slightly until berries get soft and mixture gets nice and syrupy--usually about 10 to 15 minutes
Taste and add more sugar or nutmeg to taste

Mmmm I'm getting hungry just thinking about this stuff!  I hope you and your family enjoy it as much as we do!! 

Tuesday, December 21, 2010

Quicky and Easy Pecan Caramel Candies

One of my family's dear friends, Susan, pulled this recipe out of a magazine years ago, and we have been making it ever since.  It is SO fast and easy, and I have never come across anyone that didn't like them.  You can make them ahead of time to take to church functions, or to put out as part of your holiday buffet.  They also work great in a gift basket with a bunch of other yummy goodies, or as a hostess gift.  I like to put them in a mason jar decorated with ribbon--or with stickers if Jay is helping.   

Ingredients:
63 mini pretzel twists
1 13 ounce package of Rolo candies--unwrapped
63 pecan halves

Directions:
line 2 baking sheets with foil
Place pretzels on foil about 1 inch apart
Top each pretzel with 1 piece of Rolo candy
Bake at 250 for about 4 minutes
You want the chocolate softened, but to still retain its shape
Remove from oven and immediately press a pecan half gently into each piece of candy
Allow to cool and refrigerate

Seriously, give these a try!  They are really good, especially for something SO easy and quick to make! 

Monday, December 20, 2010

Don't Miss The Lunar Eclipse Tonight!!

Did you know that there will be an extra long Lunar Eclipse tonight!?!?  (Thank you Christine for letting us know!!)  Jay loves the moon, so we are very excited!  Ha ha we will actually wake him up tonight just so that he can see the eclipse! 


Tonight for the first time since 1638, the lunar eclipse will fall on the winter solstice. The significance of this is that the eclipse will be longer than normal. The Earth will be directly between the moon and sun for about 72 minutes tonight, from 2:41am - 3:53 am Eastern Standard Time. This is going to make the moon a rusty orange-red color for that time. It will be amazing! 

If the skies are not clear in your area, NASA will be streaming live video of the eclipse from their website.  But either way, I definitely recommend checking it out!! 

Sunday, December 19, 2010

The North Pole Express

 Jay has a bit of a thing for trains, so this year we decided to take him on the North Pole Express.  There is a local train in our area that really goes all out for Christmas!  They decorate the train inside and out, and the kids are encouraged to wear their pajamas for the train ride.  They get to sing Christmas carols, listen to a reading of The Night Before Christmas, and Santa even comes onto the train for a visit!! 

I tried and tried to get Jay to wear his train pj's, but he wouldn't!  He insisted on wearing his alien space ship ones.  Ha ha I tried!!  Here is Jay waiting in line with his hot cocoa:

They do this live stage performance thing before you ride the train, and honestly, we could have done without it.  Ha ha Jay asked me the whole time when we were going to go onto the train!

My boys heading to the train!  You walk through a tree lined path to get to the train, and they even have a snow machine.  :0)

The inside of the train:

Jay LOVED the train ride! 

The Hubbs and Jay looking out the window:

Santa!!  And Jay made sure to ask Santa (again) for a bunny rabbit.

We had a lot of fun, and Jay definitely loved the train ride!!  We also played in the North Pole Village when we got off the train, and it was kind of neat too.  Jay tried his first piece of funnel cake, and watched a real blacksmith at work.  :0)   


'P' is For Pie

This week we will cover:
The letter 'P'
'P' is for Pie
The number 16
Pentagons
The color Pink
Opposites

Monday: The Letter 'P'
-color a Letter 'P' coloring page
-while you are coloring, watch this, this, this, and this
-have your kiddo trace the Letter 'P' on their coloring page with their finger
-glue your coloring page to a piece of Pink construction paper and hang it on the wall
-make a set of Letter 'P' memory cards (one with a Letter 'P' on it, and the other with a picture of a Pie on it)
-go through the Letter 'P' section of Starfall
-have a Letter P Picnic (If it is cold, have it in your living room floor.  :0)  Eat all sorts of yummy 'P' foods like Peanut butter sandwiches, pizza, pancakes, pasta, popcorn, peanuts, peaches, pears, pink lemonade, pickles, pretzels, pumpkin cookies, etc.)

Tuesday: 'P' is for Pie
-color a Pie coloring page
-while you are coloring, watch this and this
-glue your coloring page to a piece of Pink construction paper and hang it on the wall
-bake play dough Pies.  (Use your play dough to "bake" up all sorts of creative pies.)

Wednesday:  Bake a Pie Day
With Christmas fast approaching, most of us have a baking list a mile long!  So today, spend some time with your kiddo baking a pie--or several pies.  You can freeze them until you need them later this week.  :0)  But be sure to cut a slice or two for you and your kiddo to enjoy today too!! 
-watch this, this, and this
-talk about opposites and find some opposites in your house

Thursday: The Number 16
-color a Number 16 coloring page
-while you are coloring, watch this, this, and this
-have your kiddo trace the Number 16 on their coloring page with their finger
-glue your coloring page to a piece of Pink construction paper and hang it on the wall
-print a Pie coloring page and cut the Pie into 16 slices.  Put the pie back together and count the slices as you go (you can also just cut a construction paper circle into pieces and use that instead)
-'P's in a pie game (cut 16 letter 'P's out of magazines and newspapers--try to use larger sized ones.  Place them into an empty pie pan.  Take the letter 'P's out of the pie pan one by one and glue them to a piece of construction paper.  Count them as you go, and then count them again when they are all glued to the paper. Write the number 16 somewhere on the paper, and then hang it on the wall.)

Friday:  The Color Pink
-watch this
-make the color pink (mix red and white paint together to make different shades of pink)
-use your pink paint to paint a Pink Pie on some construction paper
-while you are on the subject of colors, talk about black and white--they are opposites after all  :0)
-play the I Spy Something Pink game (look around your house for things that are pink)

I hope that you guys had fun learning the letter 'P' this week!  Remember that there will not be a new lesson plan until January 2nd, so be sure to check back then for 'Q' is for Quarter.  As always, if you have missed a previous lesson, you can click on the ABC Lesson Plans tab at the top of the blog to find them.  I hope that you and your family have a wonderful Christmas and a very Happy New Year!!  Happy Holidays from my family to yours! 

Saturday, December 18, 2010

Our Gingerbread House

I saw this gingerbread house kit at the store for like six bucks and decided to give it a try.  At the time I thought "Oh how fun!" and the kit said it was easy...Ha ha I should have researched a little more before taking it on!!  The icing they included in the kit did NOT work at all, so it became a gloppy runny mess.  But Jay still had lots of fun eating the candy and we managed to get some of it onto the house...

Thankfully, The Hubbs put the walls up for us, so they stood up to all our decorating attempts!

Jay really did have a blast putting it together!  (in case you can't tell from his chocolate stained face!)

Ha ha and this is our finished house:
I know...we are definitely not pastry chefs...

But I can say that all in all, it was fun.  And I have learned that next time I need to buy a different type of icing to use as the glue.  One that actually works!  And if I am really smart, I will have our family friend Susan come visit, Susan has won contests with her gingerbread houses!!  So next year, if I post pictures of some astoundingly beautiful gingerbread house...you can thank Susan! 

Tuesday, December 14, 2010

Pecan Pie Mini Muffins

I am not sure if I have ever mentioned this before, but when I married The Hubbs, I had NO idea what an awesome and fantastic Grannie I was inheriting!!  She is a true southern lady, and she is always ready to feed a crowd, which is great because she is seriously a stellar cook!  This is one of her recipes.  She serves these as a breakfast, but honestly, they are a bit sweet for my morning palate...so I typically eat them as a dessert.  They are great warmed up with a small scoop of vanilla ice cream or just served with a nice dollop of whipped cream--the real stuff not the plasticy tasting cool whip.  Mmmmmm!! These would make a wonderful and easy addition to a holiday buffet, so give them a try!   

Ingredients:
1 cup brown sugar
1 cup Pecans--finely chopped
1/2 cup flour
2/3 cup butter--melted
2 eggs
1 teaspoon vanilla

Directions:
In a mixing bowl, combine brown sugar, pecans, and flour.
In a separate bowl, combine butter, eggs, and vanilla.
Pour the butter mixture over the flour mixture and mix together with a spoon.
The mixture will be pretty thin, and that's OK.
Grease and flour a mini muffin pan (or use some cute muffin tin liners).
Fill each muffin tin half full with the batter.
Bake at 350 (or 340 if you are using a dark or nonstick pan) and bake for 20 minutes. 
This recipe makes 2 1/2 to 3 dozen little mini muffins

These also freeze quite well, so you can make up a batch ahead of time and just defrost them when you are ready!  Enjoy!

Sunday, December 12, 2010

'O' is For Owl

I hope you had fun learning the letter 'N' last week!  I am glad that we made it through without any bruised fingers!  To say that Jay loves hammering nails is an understatement...  This week is all about Owls, and I couldn't have planned a better day to start this week off if I had tried.  Today was my Grandma's birthday, and she LOVED owls!  :0) 

This week we will cover:
The letter 'O'
'O' is for Owl
The number 15
Pentagons
The color Pink
Opposites

Monday: The Letter 'O'
-color a Letter 'O' coloring page
-while you are coloring, watch this, this, this, and this
-have your kiddo trace the Letter 'O' on their coloring page with their finger
-glue your coloring page to a piece of Pink construction paper and hang it on the wall
-make a set of Letter 'O' memory cards (one with a Letter 'O' on it, and the other with a picture of an Owl on it)
-go through the Letter 'O' section of Starfall
-make Ornate 'O's (Cut a Letter 'O' out of construction paper and use stickers, glitter, buttons, and all sorts of other things to decorate)
-make cheeriO garlands to hang in your yard for the birds or to decorate your Christmas tree with
-print out this Opposites Book and read it with your kiddo

Tuesday: 'O' is for Owl
-color an Owl coloring page
-while you are coloring, watch this this and this
-glue your coloring page to a piece of Pink construction paper and hang it on the wall
-go over some Owl fun facts
-make this adorable paper plate Owl
-work this cute online Owl puzzle or try this Owl puzzle
-print out this and this to make an Owl out of heart shapes

Wednesday:  Family Day
-My grandma, Jay's great grandma, loved owls.  So today we are going to go put some flowers out for her.  Jay is also going to color this to take with the flowers.  But you can do any number of fun things!  You can watch Winnie the Poo (with Owl in it of course) you can go bird watching, sing 'O' Holy Night, or just spend some time together as a family!  But whatever you do, have fun!!
-try to eat a letter 'O' themed snack today (oranges, olives, oatmeal, etc)
-talk about opposites and then look for things in your house that have opposites (the door open and the door closed, the lights on and the lights off, the water cold and the water hot etc)

Thursday: The Number 15
-color a Number 15 coloring page
-while you are coloring, watch this, this, and this
-have your kiddo trace the Number 15 on their coloring page with their finger
-glue your coloring page to a piece of Pink construction paper and hang it on the wall
-CheeriO Counting (get 15 cheeriOs out and count them.  Group them into three groups of five, one group of ten and one group of five one big group of 15 etc.  When you are done counting your cheerios string them onto a piece of string or yarn to make a fun necklace!)

Friday:  Pentagons
-color a Pentagon coloring page
-have your kiddo trace the pentagon on their coloring page with their finger
-glue your coloring page to a piece of Pink construction paper and hang it on the wall
-talk about Pentagons, count the number of sides
-play this fun online Opposites game

Can you believe we have made it almost half way through the alphabet!?  I hope you and your kiddo are learning, but more importantly, having lots of fun!  If you have missed a previous week, you can find it by clicking on the ABC Lesson Plans tab at the top of the blog.  And be sure to check back next week for 'P' is for Pie.  Yummy!!

Tuesday, December 7, 2010

My Mom's Peanut Butter Cookies

My mom made these cookies all the time when I was growing up, and they are wonderful!!  They stay moist and soft, and have a great peanut butter flavor.  Give them a try, you'll be glad you did! 
Ingredients:
1 1/4 cups flour
1 1/4 teaspoon salt
1 teaspoon cinnamon
1/2 teaspoon baking soda
1/2 cup butter
1/2 cup brown sugar
1/2 cup sugar
1/2 cup creamy peanut butter
1 egg
1 teaspoon vanilla

Directions:
Cream butter, peanut butter, brown sugar, sugar, egg, and vanilla together.
In a separate bowl, sift and combine the flour, salt, cinnamon, and baking soda.
Add the flour mixture to the butter mixture and combine well.
Steal a finger full of dough and eat it--just because it is SO yummy--I'm bad I know, but try it...seriously.
Roll tablespoons of dough into balls and place them a few inches apart on a baking sheet.
Use a fork to flatten and make a criss cross shape on the dough.
Bake at 375 (or 365 if you are using a dark or nonstick pan) for 10 minutes.
Be careful not to over bake because these get crunchy in a hurry--which I suppose is great if you like crunchy cookies.  :0)

And for some added umph add a Hershey's kiss (unwrapped) to the middle of each cookie after you make the criss cross pattern on them. They'll be a special treat for sure!  Enjoy!


Sunday, December 5, 2010

'N' is for Nail

Ha ha, I know that Nails are a bit unorthodox when it comes to ABC lesson plans, but what can I say...we have spent the past six months renovating our house.  So Jay is all too familiar with nails.  :0) 

This week we will cover:
The letter 'N'
'N' is for Nail
The number 14
Crescents
The color Gray
Right and Left

Monday: The Letter 'N'
-color a Letter 'N' coloring page
-while you are coloring, watch this, this, this, this, and this
-have your kiddo trace the Letter 'N' on their coloring page with their finger
-glue your coloring page to a piece of Gray construction paper and hang it on the wall
-make a set of Letter 'N' memory cards (one with a Letter 'N' on it, and the other with a picture of a Nail on it)
-go through the Letter 'N' section of Starfall
-color this fun Letter 'N' worksheet
-make Noodle 'N's (Use pipe cleaners and penne pasta noodles to make letter 'N' shapes.  You can even make a noodle necklace to hang your noodle 'N' on!)
-take a few moments to go over right and left again (Just talk about things as you do them, like putting your right arm in the sleeve and then your left arm, putting your right show on, and then your left shoe etc)

Tuesday: 'N' is for Nail
-color a Nail coloring page
-while you are coloring, watch this
-glue your coloring page to a piece of Gray construction paper and hang it on the wall
-sing this Noisy Nails song
-Nail 'N' (use real nails, or nails cut out of construction paper to make the letter 'N')
-does your kiddo have a tool set?  If so, get out the hammer and nail part of it and play away!
-take a moment to go over right and left again

Wednesday:  Building Day
 -Today is all about fun! Here are some great ideas:
Build a birdhouse and let your kiddo help you nail it together
Are there any houses or buildings being built in your area?  If so, take a trip to watch the workers build   for a while
You can also check to see if there are any Habitat for Humanity houses being built near you.  If so, they   are always in need of people to bring lunch or snacks.  So see if you and your kiddo can sign up to make a special delivery!
-do the Hokey Pokey (that's what it's all about after all) The purpose of this is to help your kiddo learn right and left, so go slow, spend extra time, and even repeat things.  Use things like right hand, left hand, right leg, left leg, right foot, left foot, right ear, left ear, right arm, left arm, right elbow, left elbow etc. 


Thursday: The Number 14
-color a Number 14 coloring page
-while you are coloring, watch this, this, and this
-have your kiddo trace the Number 14 on their coloring page with their finger
-glue your coloring page to a piece of Gray construction paper and hang it on the wall
-How many days are there until Christmas!?  Did you know that on Saturday there will only be 14 days left?  Have your kiddo count them on the calendar!
-build a Lego tower (use legos and see if you can make a tower 14 legos tall!)

Friday:  The color Gray
-talk about the color Gray and how there are many different shades of Gray
-use black and white paint to make several different shades of the color Gray
-use your Gray paint to paint a picture (you can paint nails, mountains, cars...anything!)

I hope you had fun learning the Letter 'N' with us!  If you have missed a previous lesson, you can find it at the top of the blog under the ABC Lessons tab.  And be sure to check back next week for 'O' is for Owl. 


Tuesday, November 30, 2010

Easy Baked Grilled Cheese Sandwiches

Have you been as busy as we have this holiday season!?!?  This recipe is great for those nights when we just need something fast to put on the table for dinner or for a quick lunch. 

Ingredients:
16 slices of cheese (you can use all one kind or two different kinds)
8 slices of bread
butter
You can also add things like tomato slices, bell pepper slices, olives, mushrooms, leftover turkey, or lunch meat to your sandwiches

Directions:
Preheat oven to 450
Butter one side of each of the bread slices
Place 4 slices of bread, butter side down, onto a cookie sheet
Place one slice of cheese on top of each slice of bread
Put any other fillings you want to use--like tomatoes or ham--on top of the cheese
Top with another slice of cheese
Add a slice of bread to the top of each stack, with the butter side up
Bake for 4 to 5 minutes
Flip
bake another 3-4 minutes until done

This recipe isn't glamorous, but it is definitely a keeper!  You can add extra bread and cheese is to make the number of sandwiches that you need for your family.  And play around with the fillings!  I love mine made with turkey and tomato slices.  Yum! 

Sunday, November 28, 2010

'M' is for Moose

I hope that you and your family had a wonderful Thanksgiving this year!  This week, we will be learning all about the letter 'M' and about a family favorite for us, Moose!  Jay's papa's nickname is Moose, so they have always held a very dear place in our hearts.  :0)

This week we will cover:
The letter 'M'
'M' is for Moose
The number 13
Crescents
The color Gray
Right And Left

Monday:  The Letter 'M'
-color a Letter 'M' coloring page
-while you are coloring, watch this, this, this, this, this, and this
-have your kiddo trace the Letter 'M' on their coloring page with their finger
-glue your coloring page to a piece of Gray construction paper and hang it on the wall
-make a set of Letter 'M' memory cards (one with a Letter 'M' on it, and the other with a picture of a Moose on it)
-go through the Letter 'M' section of Starfall
-do this Letter 'M' worksheet
-Letter 'M' book hunt (go through your stash of children's books with your kiddo and look for things that start with 'M' (You will be surprised at how many things you find!  Mountains, muffins, magnets, movies, mirrors, men, monkeys, etc)
-talk about right and left hands.  Did you know that your left hand makes the letter 'L' when you hold it up?  Show your kiddo that their pointer finger and their thumb make the letter 'L'.  Your right hand is the one that goes over your heart when you say the Pledge of Allegiance. 

Tuesday:  'M' is for Moose
-color a Moose coloring page
-while you are coloring, watch this and this and this
-glue your coloring page to a piece of Gray construction paper and hang it on the wall
-work this cute online Moose puzzle
-make a Moose paper bag puppet (print the head and antlers and body templates, let your kiddo color the pieces, and follow these directions for assembly)
-right and left hand print poster (trace your kiddos left hand onto a piece of green construction paper and their right hand onto a piece of red construction paper. Cut out the hand prints and glue them to a piece of construction paper, making sure that the hand prints are in the correct order of left and then right. As your kiddo decorates the paper, talk about left and right.  On your poster, the left hand is green because you start at green and the right hand is red because you stop at red.) 
Hang your hand print poster somewhere on the wall where it is easily visible!

Wednesday:  Fun Day
-have fun with your kiddo today!  You can take a trip to the zoo to watch some Moose if the weather is nice, or watch a movie with Moose in it, like Brother Bear, and snack on some Moose Munch.  Or if you are fortunate enough to live in an area that has Moose in it, go on a nature hike and look for one.  Be creative, and, regardless of what you do, make it fun!
-learn this fun rhyme:

This is my left hand, I'll hold it up high,
(Raise left hand high.)
This is my right hand, I'll touch the sky.
(Raise right hand high.)
Left hand, right hand, roll them around.
(Roll fists over each other.)
Right hand, left hand, pound, pound, pound.
(Pound fists on each other.)

Thursday:  The Number 13
-color a Number 13 coloring page
-while you are coloring, watch this, this, this, and this
-have your kiddo trace the Number 13 on their coloring page with their finger
-glue your coloring page to a piece of Gray construction paper and hang it on the wall
-count to 13 game (choose an item like leaves, toy cars, blocks etc and put them into a basket or bucket one at a time.  Count them as you go, and stop when you get to 13.  You can do this with several items.  If the weather is nice, we'll probably head outside to collect leaves, rocks, sticks, and pecans.)
-make a 13 point set of moose antlers.  (draw a set of moose antlers with 13 points on them and let your kiddo decorate them.  You can even turn them into a hat by attaching them to a strip of construction paper formed into a circle.)
-talk about and practice left and right again
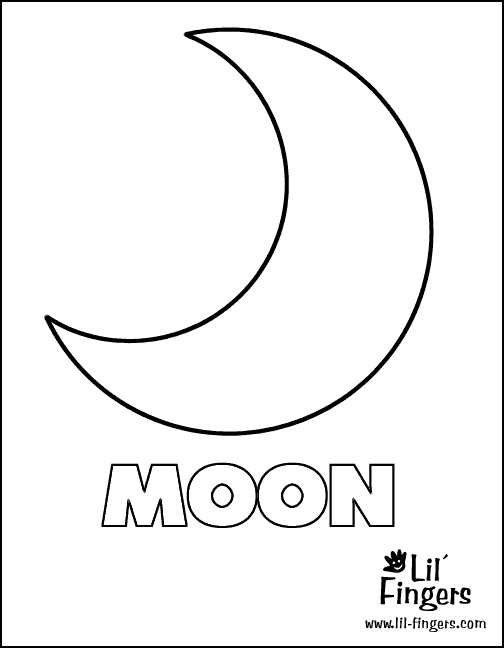
Friday:  Crescents
-color a Crescent coloring page
-have your kiddo trace the Crescent on their coloring page with their finger
-glue your coloring page to a piece of Gray construction paper and hang it on the wall
-What can you think of that is Crescent shaped!?  How about the moon!  Talk about the moon with your kiddo.
-Moon craft (cut out a crescent shape in yellow construction paper and let your kiddo decorate it.  You can then glue it to a piece of black construction paper, or hang it from the ceiling!)
-Read Goodnight Moon

I hope you have fun learning the Letter 'M' with us!  If you have missed letter, you can find past lessons under the ABC Lessons tab at the top of this blog.  And remember to check back next week for 'N' is for Nail.

Friday, November 26, 2010

Christmas Kids Crafts

Hooray!!  I can finally start thinking about Christmas crafts and decorations!!!! 

Ha ha in case I haven't mentioned it, I LOVE the holidays!!!  Thanksgiving has its place, but Christmas has my heart!  Our month of December will be packed with Christmas cheer!  We'll be going to tree lightings, listening to Christmas Carols, taking a trip back in time to walk through Bethlehem, taking a train ride to the North Pole, and singing our hearts out at our church's candle light service...just to name a few things.  But in between all of the bigger events, I want to make sure that Jay has lots of fun making crafts and ornaments and helping decorate our home for the holidays! 

I know there are way too many to do them all, but here is a list of links to all sorts of fun crafts that you and your kiddos can check out this year:

-Make a Santa Advent Calendar
I generally prefer a religious base for our Advent calendars, but this little Santa that you glue cotton balls to each day is pretty darn cute!  Maybe this year we'll have two calendars...

-Here is a more religious Advent Wreath that is also pretty cute

-Oh, and check out this Hand Print Countdown Calendar it is pretty cute too!

-Color and do this fun Christmas Tree Shapes Worksheet (Ha ha you know I have to throw in a few educational things for Jay)

-Trace your kiddos hands onto some construction paper to make an adorable Hand Print Wreath to hang on your front door

-Make a fun Hand and Foot Print Reindeer

-Use paper plates to make this Paper Plate Angel

-Make a Christmas Stocking, or make several smaller stocking and use them as ornaments on your tree!

-Let your kiddos make and decorate their own gift boxes this year.  You could even use poster board and make a larger box.  :0)

-Make some Crystal Snow Flake Ornaments to hang on your tree

-Or Use yarn, glue, and glitter to make some Yarn Snow Flakes to put on your tree

-Pick up some glitter glue from the dollar section in Target and make these Snow Flake Window Clings or ornaments

-Make some Glass Ornament Snowmen--but I would actually use plastic ornaments instead of the glass ones.

-make Bubble Wrap Ornaments with bubble wrap and some washable paint

-Make your kiddo a fun felt Elf Hat to wear around town

-Make little wreaths out of pipe cleaners to hang on your tree or around your house

-Color and make this Nativity Scene

-Make a Hand Print Angel ornament to hang on your tree, or to send to a grandparent or loved one

-Make a Santa Hand Print ornament--or make a bunch of them and turn them into a garland

-Make Beaded Candy Canes and Wreaths.  This link shows them as pins, but we just made them as ornaments for our tree.  Oh, and I wouldn't buy the little "kit" they sell either.  Just grab some beads and pipe cleaners at the dollar store or Walmart to use.

-Make Drums for your little drummer boys--or girls.  This link uses lids, but you could just use an old oatmeal container or something.   

-Make Beaded Snowflake ornaments for your tree

-Make Glitter Ball ornaments with some glitter glue and a few plastic ornament balls

-Make a Santa Windsock to hang on your porch

-Make and eat this cute Snowman on a Stick with your kiddos

-Be sure not to leave the birds out!  Make a fun Pretzel Wreath for them to much on, or make garlands of popcorn to hang in your yard for them to eat!

-Make a Stained Glass Angel for your window.  Print and color the angel in the link.  Then rub baby oil--or any oil--onto the picture.  The oil will make the paper transparent.  Cut out the angel, punch a hole through it, tie string through the hole, and hang it in your window. 

-Do this fun "Find the Difference" worksheet

-Print out and color this Christmas Alphabet book

-Follow this link to check out some fun online games and printable Christmas activities.  The printable things would be wonderful for road trips or to have on hand for long lines to see Santa...

-Make your very own Snow Globes

-Make these non-edible Cinnamon Applesauce Ornaments.  My mom used to make these with me when I was a kid, and they really do smell wonderful! 

-Shake some glitter onto construction paper to make these White Glitter Ornaments

-Print out the template and make these adorable Felt Birds

-Use paper to make some Paper Drop ornaments

Whew, there are just TONS of Christmas craft ideas out there!  And I know Jay and I are going to try our hand at a few of them for sure!  But make sure that you also take time to do the usual Christmas fun things like bake cookies, sing Christmas carols, read lots of Christmas books, and just enjoy the wonderful holiday cheer with your family this year!   

And, now, for my trip down Mommy Memory Lane:

Here is Jay sitting on top of our Christmas tree for his first Christmas:
 
Here is Jay "helping" The Hubbs put up our tree for his second Christmas--last year. 
 And here is Jay on his favorite gift from last year--a little battery powered four wheeler that Grandma got for him.  He still LOVES that thing!  Ha ha and yes...that IS snow!  Woo Hoo!!!! 

And, just as a disclaimer, Christmas is definitely NOT all about the gifts for us.  I just really love this picture of Jay!  :0) 

So here's to hoping that you and your family have a very blessed, safe, and wonderful holiday season this year!! 

Tuesday, November 23, 2010

My MIL's to Die For Chocolate Cake

My husband grew up eating this chocolate cake, and his family expects if at every family gathering.  I didn't get it at first...and then I got pregnant with Jay. 
After being sick with "morning" sickness for months on end, The Hubbs' birthday rolled around and one of these beauties showed up at our house.  I am ashamed to say that he didn't get very much of his birthday cake that year! 
The frosting is like fudge, it is SO yummy!!  So give this chocolate cake recipe a try, it is sinful, and by NO means healthy, but it is SO good!!

Cake Ingredients:
2 cups flour
2 cups sugar
1 stick butter
1/2 cup shortening
4 tablespoons unsweetened cocoa powder
1 cup water
2 eggs--beaten
1/2 cup buttermilk
1 teaspoon baking soda
1 teaspoon vanilla

Cake Directions:
In a small sauce pan, melt and bring the butter and shortening to a boil.  Remove from heat while you measure and mix the dry ingredients
In a mixing bowl, combine the flour, sugar, cocoa, and soda
Add the water, buttermilk, eggs, and vanilla to the butter mixture
Add the wet mixture to the dry mixture and stir to combine
Bake at 400 (or 390 if you are using a dark nonstick pan) and bake for 20 minutes
Remove to a wire rack and cool completely before frosting
You actually leave this cake in the pan to serve--trust me, don't try to take it out of the pan! 

Frosting Ingredients:
1 1 pound box powdered sugar  (or about 3 3/4 cups if you measure it out)
1 teaspoon vanilla
1 stick butter
4 tablespoons unsweetened cocoa powder
6 tablespoons milk

Frosting Directions:
In a small saucepan melt and bring the butter to a boil over low heat
Remove from heat and set aside while you combine dry ingredients
Combine sugar, and cocoa powder in a mixing bowl
Add the vanilla and the milk to the butter
Add the wet ingredients to the fry ingredients and mix well
Spread evenly onto cake

Mmmm my mouth is watering just typing this recipe!  I hope you give it a try and love it just as much as we do!


Friday, November 19, 2010

I'm an Aunt (again)

Isn't this just the absolute cutest baby ever!?


 We welcomed this tiny bundle of joy to our family this Wednesday, November 17th.  And I would like to add that it was the day that I guessed for his birthday.  Ha ha so I think that is his way of saying that I am his favorite aunt--that's my story and I'm sticking to it!!  

Tuesday, November 16, 2010

My Grandmother's Pecan Pie

My Grandmother makes the best pecan pies!  I have grown up eating them, and watching my dad and granddaad tease each other over who gets the last slice of pie.  And when I say tease...they will even go so far as to hide the pie from each other.  It is quite a spectacle, and my holidays just would not be the same without it!  :0) 

So I thought this year, I would share my grandmother's famous recipe with you:

Ingredients:
1 unbaked 9" pastry shell (you can use store bought or make your own)
3 eggs
1 cup white corn syrup
1 cup sugar
2 tablespoons butter--melted
1 teaspoon vanilla (use the real stuff not the imitation)
1/8 teaspoon salt
1 cup pecans
1/4 cup orange juice (fresh squeezed is best)

Directions:
Beat eggs slightly
Mix in corn syrup, sugar, butter, vanilla, salt, and orange juice
Fold in pecans (I prefer to grind some of my pecans into little pieces and then top the pie with whole pecans, but you can just leave them all whole if you prefer)
Pour into pastry shell
Bake at 400 for 15 minutes
Reduce heat to 350 and bake another 25 to 35 minutes
The filling should be slightly less set in the center than around the edges

**taste your filling after you add the orange juice.  If your oranges were tart, you might want to add a little more sugar to sweeten up the pie a bit**

Ha ha I hope this pie recipe brings the same kind of joy to your family that it has brought to mine!  It is something that I will always cherish, and be thankful for!

Sunday, November 14, 2010

'L' is for Lion

So did you have fun flying Kites last week!?  I was SO looking forward to it with Jay, but he got sick with a cold.  :0(  I guess we'll have to fly our kite another time!  This week is all about Lions...roar!

This week we will cover:
The letter 'L'
'L' is for Lion
The number 12
The color Gold
Diamonds
Different Tastes

Monday:  The letter 'L'
-color a letter 'L' coloring page
-while you are coloring, watch this, this, this, and this
-have your kiddo trace the letter 'L' on their coloring page with their finger
-glue your coloring page to a piece of gold paper (or a piece of white paper colored or painted gold) and hang it on the wall
-go through the letter 'L' section of starfall
-make a set of Letter 'L' memory cards (one with the letter 'L' on it and the other with a picture of a lion on it)
-Make a maple Leaf turkey or if you don't have maple Leaves, make this oak Leaf turkey 
-do this letter 'L' worksheet

Tuesday:  'L' is for Lion
-color a Lion coloring page
-while you are coloring, watch this
-glue your coloring page to a piece of gold paper and hang it on the wall
-make a paper plate Lion (a fun way to add a colorful mane is to use fall Leaves.  Just glue the leaves around the paper plate.)
-do this fun online Lion puzzle
-sing We're Going on a Lion Hunt

Wednesday:  Lion Day
-talk about these fun Lion facts
-if the weather is nice, head on over to your local zoo to spend a while watching the lions
-if the weather is not so nice, watch a lion movie like The Lion King
-learn about spicy foods (talk about things that are spicy like peppers, salsa, black pepper, Mexican food, Indian food, etc.  Choose a milder form of spicy food for your kiddo to try such as a very mild salsa or just adding a dash of pepper to a bite of their dinner.  Make sure to have some milk handy just in case the food is too spicy!)

Thursday:  The number 12
-color a number 12 coloring page
-while coloring, watch this, this, this, and this
-have your kiddo trace the number 12 on their coloring page with their finger
-Collect 12 (go out into your yard and collect 12 of something.  You can collect leaves, nuts, pine cones, etc.  Count the items as you collect them and then count them all again once you have all 12.) 
-talk about the number 12.  It is one dozen--you can always count 12 eggs.  Use blocks or any group of toys to show your child the number 12.  Use the blocks to make one group of 12, two groups of six, and three groups of four. 

Friday:  The color Gold
-watch this
-talk to your kiddo about the color gold.  What makes it different from colors like yellow or orange? (it is metallic)  Where does real gold come from?
-go digging for gold (you can use a sandbox, some rice, or even play dough for this activity.  Cut out pictures from magazines of things that are gold, or use small gold colored objects from around the house.  Use things like costume jewelry, jar lids, gold crayons, small picture frames, belt buckles, etc.  Bury them and have your kiddo "dig" them out.)
-review the different tastes you have learned.  What did you like the best?  What did you like the least?  etc. 

I hope you have fun learning the letter 'L' this week!  and just to give everyone a heads up, we will be taking the week of Thanksgiving off.  So I won't post a lesson plan on the 21st, the next lesson plan will be posted on the 28th on November.  Thank you all for understanding!  If you have missed a previous lesson plan, you can find it under the ABC Lesson Plans tab at the top of the blog.  And be sure to check back on the 28th for 'M' is for Moose! 

Friday, November 12, 2010

Thanksgiving Craft Ideas

I LOVE the holidays!  Ha ha and I can't wait to get started on some fun Christmas crafts, but in the mean time, here are some cute Thanksgiving craft ideas to keep your little ones occupied:

-Print out this Thanksgiving book:
in color or in black and white

-Sing a Thanksgiving Song:
Pick one, or several of these songs to sing.

-Play Pin The Feather on The Turkey:
I don't have a link for this one, but it is really easy.  Draw, or print out a turkey and cut out some construction paper feathers.  Blindfold your kiddos and have them try to stick the feathers to the turkey.  Use rolled up pieces of tape to stick the feathers on.

-Make Butter
The link makes this look way more complicated than it is.  You just need to fill something like a baby food jar or other small jar about half full with cream and shake shake shake it.  But here is the link with more intense instructions.


-Make a fun Hand and Foot Turkey

-Make a cute Paper Scarecrow to hang up in your house:

-Make this adorable Pine cone Turkey

-Make a Thankful Turkey
I think this would be fun to do on Thanksgiving day.  Everyone could write what they were thankful for on a feather and add it to the turkey.

-Play Turkey Bingo
This would be SO fun to do on Thanksgiving day with a group of little kiddos!

-Make Pilgrim Hats

-Make Framed Hand print Turkeys
These would be SO cute to make every year and hang up as a grouping on your walls.  :0)

-Make Finger Puppet Pilgrims and put on a puppet show!

-Print and play this Thanksgiving Matching Game

-Use Fall leaves, construction paper, and some paint to make a Picture Frame

-Make Thanksgiving necklaces (or garlands) for your kiddos to munch on--or hang them in your yard to feed the birds

-Make a Handprint Wreath to hang on your door

-Use Lifesavers to make these neat Pumpkin Lolly Pops
This would be really fun for Christmas too.  You could make candy cane, or wreath, or stocking shapes!

-Make Finger Print Corn
This would be a great family activity--one ear of corn made from each person's finger prints!

-Make a craft Stick Turkey
If you don't have craft sticks, you can buy a pack of them at the dollar store.  They are the natural wood colored ones, but you can just color or paint them.  :0)
-Make a Family Hand print Turkey
I think this would so great to make for parents or grandparents that live out of state.  You could glue the hand print turkey to some paper folded to make a card, and write a sweet note inside!

-Have Mini Indian Corn Snacks

-Make a cute little turkey from a pair of gloves

-Make Mayflower Hats
It would be so fun to make different hats for each kiddo, like the Mayflower, Pilgrims, Indians, Turkeys etc. 

And just to take a walk down memory lane, here is a picture of Jay on his very first Thanksgiving:
Ha ha in my eyes, he is still this little...

I hope that at least a few of these crafts look like fun for you and your family!  Try them out, and let me know what you think!  I know that Jay and I will be giving a few of them a try for sure!  But whatever you do, take some time to make sure that your kiddos understand what Thanksgiving is really all about.  :0)